Now this is a story all about cheese
A platter of course, it was such a breeze.
I’d like to take a minute, just sit right there
We have some cheese tips, that we’d like to share.
With all the cheese plates I’ve created, both big and small, I realized to some people, a cheese plate may be intimidating. The great thing about fromage is that you CAN’T mess it up, seriously. Well, only if you forget the cheese, then yes, you can royally mess it up. Since it was the two of us, I’ll stick with tips for a smaller cheese platter. For a larger plate, just multiply the goodness!
Step 1: Pick Your Cheeses
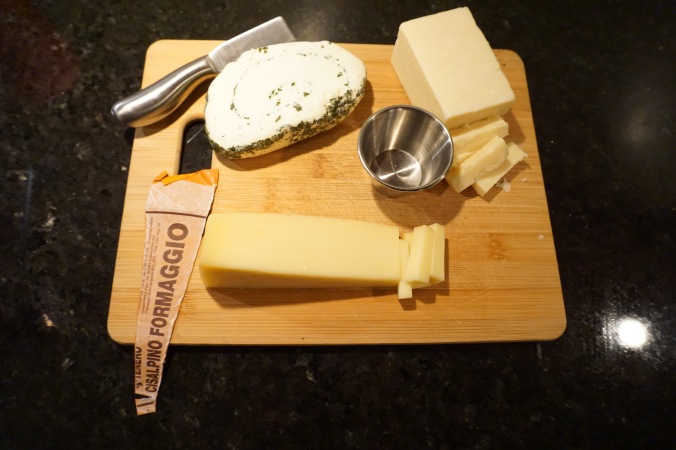
My go-to cheese pickin’ strategy: Something hard, something soft, and something funky.
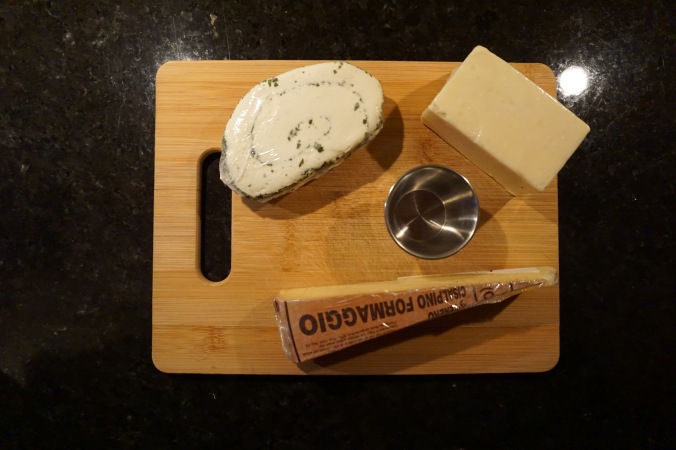
We chose Prairie Breeze cheddar, Italian fontina, and Le Roule.
Prairie Breeze: Straight out of Milton Creamery in Iowa, this cheddar is dry yet creamy to taste. It is aged for at least 9 months, but tastes like its been aged MUCH longer than that. It gets you in the ‘cheddar spot’ as I like to call it (back of your lower jaw, it’s my scientific way of rating cheddars).
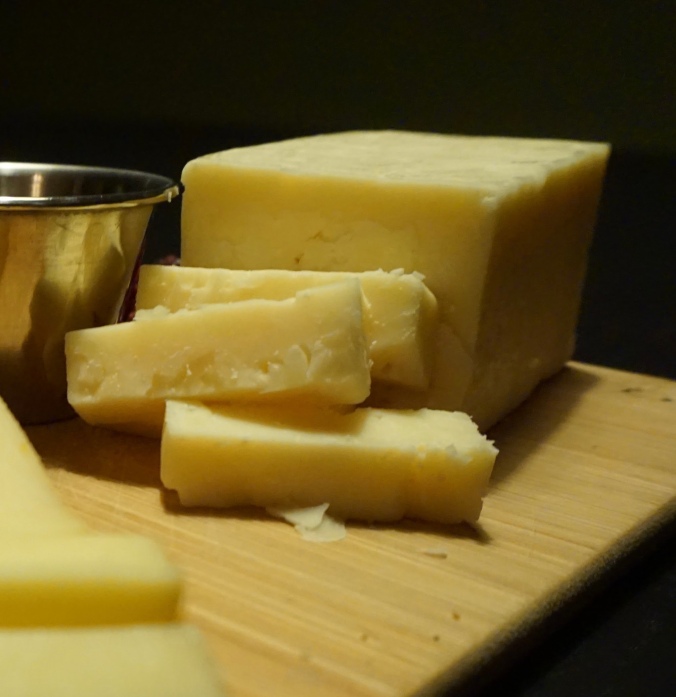
Prairie [cool] Breeeeeezeeee
Italian Fontina: Can’t go wrong with a fontina. It is, to this day, the best cheese for grilled cheese in the entire galaxy. Soft, creamy, and delectable.
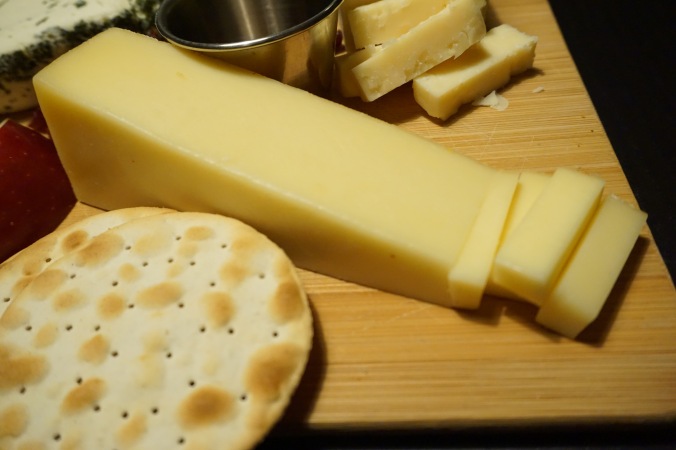
Italian Fontinuhhhhh
Le Roule: First off, you sound fancy as HAIL when you tell your guests what they are about to experience. Let me help you, “LAY- ROO-LAY.” Yes, it is French. It is a soft, spreadable cheese (once you get it to room temperature) full of garlic and herbs. Believe you me, this is one pretty cheese on ANY cheese plate. This cheese is a real crowd cheeser… pleaser.
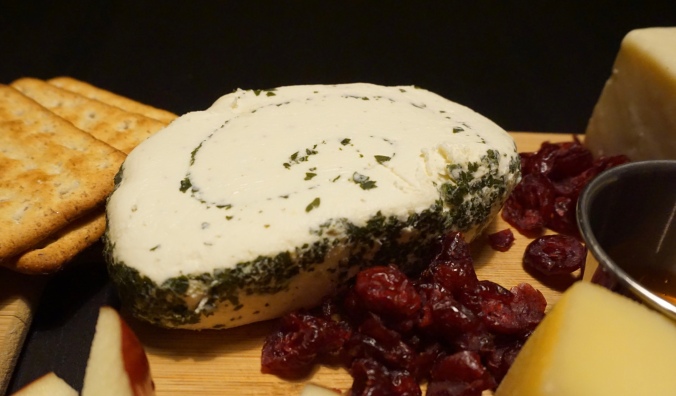
Le Roule ay ay ay
Step 2: Pick the Platter
Lay out your cheese on the platter or plate BEFORE you open them up. This will eliminate more dirty dishes and less handling of the käse. Just lay your cheese out on a platter, leaving enough room for your other adornments to fill in the gaps.
Be prepared.
Step 3: Prep the Plate
Be sure to let your cheese sit out about 30-45 minutes before guests come so they are at room temperature. This will allow all of the flavors to come out of the cheese so you can enjoy them at their fullest capacity.
Take off any wrappers that may be on the cheese. Rinds are different, rinds are the outer layer of the cheese. Most rinds are edible, except for wax, cloth, or bark. Rinds add more flavor to the cheese.
Pro Tip: Don’t eat paper.
Step 4: Select Your Accessories
This is completely up to you and your taste. I am a pretty basic bitch when it comes to my cheese accompaniments. I’ll go for grapes, berries, apples, some meats, and of course, crackers. If you wanna get wild, spring for soaked dates, or some finely cut prosciutto.
If you have more extreme, strong cheeses, try to get a bland cracker as to not take away from the cheese flavor. I’m a sucker for anything that says “crisps” on it, I love a little crunch with my käse.
Step 5: Get Your Tools
Depending on your type of cheeses, be sure to get the correct cheese knives and/or spreader. If you don’t have cheese tools, don’t fret. A knife will do JUST fine.
Step 6: ENJOY
Pour yourself a glass of wine, turn on some Marian Hill, and enjoy yourself!

You earned this.
-C


.
